The emergence of Lace Front Human Hair Wigs has been so revolutionary when it comes to our daily look and beauty routine, protective styling and quick hair changes. Lace front straight floor-length lace front wigs or natural curly looks, and what other textures can mimic real human hair that is not only high in quality but extremely versatile.
Getting a seamless look can seem a bit difficult to get the first few times. From choosing which lace tint to use on your lace to seamlessly cutting the edges off the lace wig without a ragged line, and securing your wig without damaging your hairline, the styling is a process.
For all you first-timers looking for tips and tricks of the trade, or to brush up on your current application, this fully comprehensive, no-nonsense guide will show you step-by-step how to get an invisible, all-day install.

Pre-Installation Setup: Prepping Your Canvas
You have to get your install as close as possible to a lace installation. Once your wig is placed as perfectly as it can be with your glue and your heat comb isn’t quite on point yet, your wig shouldn’t lift.
1. Prepping Your Natural Hair
To achieve a natural flat-looking crown for your wig, it relies on a perfectly flat braid down! Nothing makes a wig look as if it is perched on top of your head with raised high spots.
- Cleanse & Condition: Wash your natural hair thoroughly to remove oil and buildup. Ensure your scalp is completely dry before braiding.
- Braid Pattern: Braid your natural hair in small, flat cornrows going straight back. If your hair is short, a smooth slick-back using a strong-hold gel works equally well.
- Protect the Edges: Apply a light oil or scalp protector along your hairline to shield your baby hairs from friction and tension.
- The Stocking Cap Method: Place a nude wig cap over your braids, pulling it down just past your natural hairline. This creates a uniform tone underneath the lace.
2. Preparing the Lace
Modern lace frontal wigs human hair come with fine, semi-transparent or HD lace. Customising the lace so it matches your skin tone prevents that tell-tale white line along your forehead.
- Bleaching the Knots: Tiny dark dots show where the hair strands are hand-tied into the lace mesh. Applying a thick mixture of bleach (using 20-volume developer) to the underside of the lace lightens these knots so they disappear against your scalp.
- Plucking the Hairline: On factory wigs, most styles have straight, very thick hairlines, which are obviously fake. Use precision tweezers to thin the hair strands one by one with gaps, to gradually blend from forehead to thick hair.
- Tinting the Lace: Match the lace mesh to your skin tone using a dedicated lace tint spray, liquid foundation, or pressed powder applied to the underside of the cap.

Step-by-Step Styling: Achieving the Invisible Melt
Styling straight lace front wigs or textured wigs takes precision. Follow these steps to secure, shape, and style your hair effortlessly.
Step 1: Fitting and Trimming the Excess Lace
Put the wig on your head to check the fit before applying any product. Adjust the back straps so the cap sits snug without pulling tightly on your temples.
- Secure the wig behind your ears using clips.
- Pull the front lace taut across your forehead.
- Use small shears or a razor comb to cut the front lace away.
- Crucial tip: Always cut in a subtle zig-zag pattern rather than a flat straight line. Natural hairlines are irregular; straight lines stand out easily.
Step 2: Securing the Wig(Glueless vs. Adhesive)
Depending on how long you intend to wear your wig, choose between a daily glueless hold or a multi-week liquid adhesive.
- Glueless Method: Use an adjustable elastic band sewn inside the cap along with strong-hold holding spray along the edge. Blow-dry on cool until sticky, then press down.
- Adhesive Method: Clean your forehead with 70% alcohol to strip away skin oils. Apply 2–3 thin coats of clear wig glue, allowing each layer to turn completely clear before applying the next. Press the lace down firmly into the adhesive using the wooden end of a rat-tail comb.
Step 3: Melting the Lace into the Scalp
After your wig has been installed, wrap an elastic melt band snug across your hairline for about 10-15 minutes. This blend of pressure and soft heat moulds the lace neatly and invisibly against the skin of your face.
Shaping, Heat Styling, and Maintenance
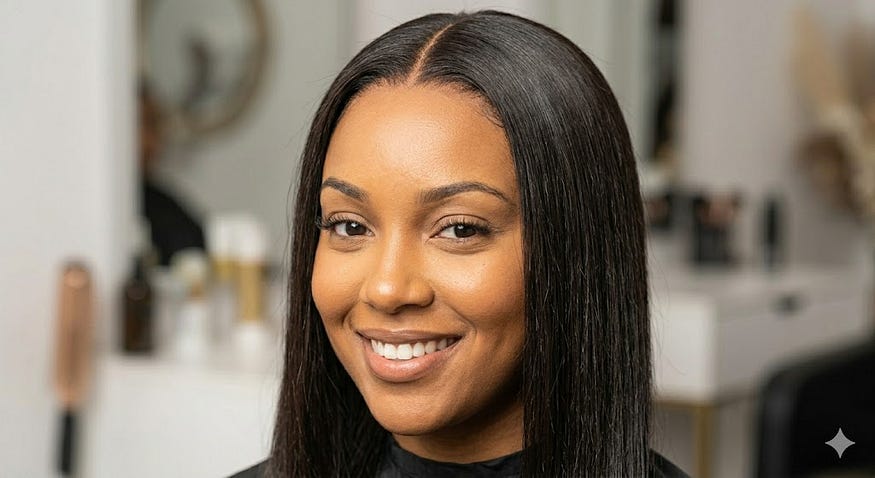
Once your wig is anchored, it is time to style the strands. Human hair gives you the total freedom to flat iron, curl, or cut layers just as you would on your natural hair.
Thermal Styling Best Practices
- Heat Protectant: Never forget a lightweight heat protective spray before you use any hot tools so split ends and dryness don’t make an appearance.
- Flat Top Hot Comb: Take a hot comb and apply it against roots coated with wax stick and press your hair all the way down towards your face.
- Precision Straightening: For straight lace front wigs, work in small half-inch sections using a titanium flat iron set between 300°F and 350°F.
Laying the Edges (Optional)
For baby hairs that are a bit wispier, simply pick out individual strands around the hairline on your forehead, apply a lightweight mousse with a very small edge brush, and sweep into the hair to get a softly sculpted swoosh. Avoid dense gels because they will cake up on the lace and turn white.
Pros & Cons of Human Hair Lace Front Wigs
Pros
- Unmatched Realism: Human hair sways, shines, and moves naturally, offering the most realistic look available.
- Versatile Styling: Can be safely colored, bleached, heat-styled, or parted anywhere along the lace area.
- Comfortable & Breathable: The sheer lace material allows airflow directly to your scalp, keeping you cool during warm weather.
- Longevity: With proper routine maintenance, quality human hair wigs last anywhere from 12 months to over two years.
Cons
- More Expensive Initially: The initial expense is higher in good quality human hair wigs than artificial hair.
- Need Regular Maintenance: Similar to our own hair, you’ll have to wash and deep condition, keep it conditioned properly and ensure it is packed away without drying out.
- Skill Needed for Customisation: Achieving a scalp-like install involves bleaching, plucking, and trimming techniques that take practice to master.
FAQs & What People Ask AI About Lace Front Wigs
How long can you leave a human hair lace front wig on?
When installed with high-grade waterproof adhesives, a lace front wig can remain secure for 2 to 4 weeks. However, keeping a wig installed longer than 3 weeks without taking it off to cleanse your natural hair and scalp underneath is not recommended.
Can you wash human hair lace front wigs while installed?
While you can clean the exposed strands, it is best to remove the wig for thorough washing. Cleaning off-head allows you to wash the cap interior, clear away leftover glue buildup from the mesh, and deeply moisturise your natural hair underneath.
What is the difference between 13×4 and 13×6 lace frontal wigs human hair?
Numbers depict measurements for your lace in inches. For example, 13×4 lace front signifies that the lace goes ear to ear (13 inches) and covers down to the back of your ear toward the crown (4 inches back). A 13×6 will provide an additional 2 inches, which equates to a 6-inch deep parting space and allows for deeper parts, high ponytails and distribution.
Why does my lace front look white or ash grey after installing?
When your lace has an ashy look as a result of the lace being a lighter colour than your natural skin tone, or if white glue has seeped under your lace, you can combat this. Apply a liquid concealer or powder foundation that is as close to your natural skin tone as possible with a small brush straight to the hairline and blend it with your lace.

Final Thoughts
The trick to styling a human hair lace front wig so it blends is to prepare, customise, and style with intention. This means bleaching the knots until you don’t see them and plucking to perfect the hairline before melting it into your skin to give you seamless, natural-looking results. And keep this natural beauty moisturised with plenty of heat protectants and regular deep conditioning, and she’ll be bouncy and beautiful for a month or longer!