Introduction
Installing a ceiling fan is one of the most effective ways to improve air circulation, reduce energy costs, and enhance the aesthetic appeal of any room. Harbor Breeze, a brand sold exclusively at Lowe’s, offers a wide range of ceiling fans that combine functionality with stylish design. This guide will walk you through the steps of installing a Harbor Breeze ceiling fan, discuss its key features, and weigh the pros and cons to help you make an informed decision.
Why Choose Harbor Breeze Ceiling Fans?
Harbor Breeze ceiling fans are popular for their affordability, contemporary designs, and energy efficiency. Whether you’re outfitting a cozy bedroom or a spacious living area, the brand offers a variety of models to suit different room sizes, ceiling heights, and décor preferences.
Key Features of Harbor Breeze Ceiling Fans:
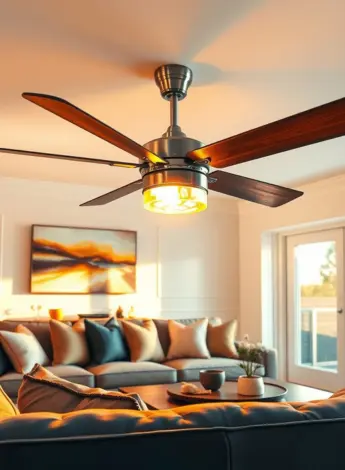
- Multiple Blade Options: Models are available with 3, 4, or 5 blades to suit airflow and design needs.
- Integrated LED Lighting: Many fans come with built-in LED lights, providing long-lasting and energy-efficient illumination.
- Remote and Wall Control Compatibility: Select models include remote controls or wall-mounted switches for added convenience.
- Reversible Motor Function: Allows the fan to run in reverse during winter, circulating warm air for improved heating efficiency.
- Quiet Operation: Harbor Breeze fans are known for their smooth, quiet motor performance.
- Damp and Wet-Rated Options: Some models are rated for outdoor use, ideal for patios, porches, and bathrooms.
Tools and Materials Needed for Installation
Before you begin, gather the following tools and materials:
- Phillips and flathead screwdrivers
- Adjustable wrench
- Ladder or step stool
- Wire strippers
- Circuit tester
- Electrical tape
- Harbor Breeze ceiling fan kit (with instruction manual)
Safety Tip: Always turn off power at the circuit breaker before working with electrical wiring.
Step-by-Step Installation Guide
1. Prepare the Ceiling Electrical Box
Ensure the electrical box is fan-rated and securely fastened to a ceiling joist. Non-fan-rated boxes may not support the weight or motion of a ceiling fan and could be a safety hazard.
2. Assemble the Fan Components
Unpack and identify all parts listed in the manual. Typically, you’ll assemble the motor housing, attach the downrod (if applicable), and prepare the mounting bracket.
3. Mount the Bracket
Install the mounting bracket to the ceiling box using screws provided. This bracket holds the fan securely in place.
4. Connect the Wiring
Carefully connect the fan wires to the house wiring, typically matching colors:
- Black (or blue) to black (hot)
- White to white (neutral)
- Green or bare copper to ground
Use wire nuts and electrical tape to secure connections, and refer to the manual for any model-specific wiring instructions.
5. Attach the Fan to the Bracket
Lift the fan assembly and hook it onto the mounting bracket. Secure it with the provided screws or clips.
6. Install the Blades and Light Kit
Attach the blades to the motor using the included screws. If your fan has a light kit, connect it per the manual, ensuring all wires are properly aligned and secured.
7. Test and Finalize Installation
Restore power at the breaker and use the remote or switch to test fan operation, including speed settings, direction, and lighting.
Pros of Harbor Breeze Ceiling Fans
- Affordable Pricing: Harbor Breeze fans are cost-effective compared to premium brands, offering value for budget-conscious consumers.
- Variety of Designs: From rustic wood finishes to sleek modern metals, there’s a fan for nearly every aesthetic.
- Ease of Installation: Designed with the DIY installer in mind, many models feature intuitive assembly and clear instructions.
- Energy Efficiency: LED lighting and Energy Star-rated models help reduce electricity consumption.
- Low Noise: Fans operate quietly, making them suitable for bedrooms and study areas.
- Good Customer Support: Replacement parts and manuals are readily available through Lowe’s and online resources.
Cons of Harbor Breeze Ceiling Fans
- Limited Availability: Since Harbor Breeze is a Lowe’s exclusive, options for purchasing or returning through other retailers are limited.
- Not All Models Are Smart-Compatible: While some models offer remote control, most do not integrate with smart home systems without aftermarket add-ons.
- Occasional Quality Variations: As with many mass-market products, quality may vary slightly between models or manufacturing batches.
- Less Customization: Some higher-end brands offer modular or customizable features that Harbor Breeze does not.
Final Thoughts
Harbor Breeze ceiling fans offer a great blend of performance, design, and affordability. Whether you’re looking to cool down your living space or enhance air circulation year-round, these fans are a reliable choice for most residential applications. With a straightforward installation process, a wide variety of models, and helpful features like reversible motors and LED lighting, Harbor Breeze continues to be a trusted name in ceiling fans.
However, be mindful of your specific needs. If you’re looking for advanced smart features or premium materials, you may want to explore higher-end alternatives. But for most homeowners, especially those with a DIY spirit, Harbor Breeze fans provide everything needed for a comfortable and stylish home environment.
