When machines stop working, the reason is often something small that was ignored earlier. One of the most common causes is poor belt installation. It may seem like a simple task, but installing a toothed belt correctly plays a big role in how long it lasts and how smoothly your system runs.
Many people only realize the importance of proper installation after facing repeated breakdowns. Some belts run for years without trouble, while others fail too soon. The difference usually comes down to how well the installation was done.
Why Proper Installation Matters More Than You Think
A toothed belt is designed to transfer motion smoothly between parts without slipping. But even the best belt cannot perform well if it is installed incorrectly. When the setup is not right, it can lead to uneven wear, strange noises, and reduced efficiency.
Over time, these small issues can turn into bigger problems like machine failure or unexpected downtime. On the other hand, a correctly installed belt supports stable operation, reduces stress on parts, and helps the system run quietly and efficiently for a longer time.
Note:
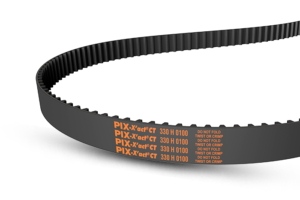
If you want to learn more about Toothed Belts(Ремни клиновые зубчатые) and how proper installation affects real-world performance, PIX Russia shares useful insights and practical knowledge. Whether you are facing repeated issues or setting up a new system, understanding the right approach can make a clear difference. Contact them to explore better ways to improve efficiency and keep your machines running without trouble.

Preparing Before Installation
Before starting the installation, it is important to prepare the system properly. This step is often rushed, but it can make a huge difference in the final result.
Begin by checking the condition of all related parts. Pulleys should be clean and free from dust, oil, or any debris. Even a small amount of dirt can affect how the belt fits and moves. It is also important to inspect for sharp edges or worn surfaces, as these can damage the belt over time.
Another important part of preparation is making sure you are using the correct belt size. A belt that is too tight or too loose will not perform properly, no matter how carefully it is installed. Taking a moment to confirm the right size can prevent many issues later.
Tools and Safety Basics
Having the right tools and following simple safety steps can make the installation process smoother and safer. Basic tools like a wrench, an alignment tool, and a tension gauge are usually enough for the job.
Before beginning, always make sure the machine is turned off completely. This reduces the risk of accidents and allows you to work with better focus. Wearing appropriate clothing and keeping hands clear of moving parts are small precautions that can prevent serious injuries.
Step-by-Step Installation Process
The installation process is where attention to detail matters the most. Even small mistakes at this stage can affect performance later.
Start by loosening the system so that the distance between the pulleys is reduced. This allows the belt to be placed easily without force. Forcing a belt into position can damage its teeth and weaken it from the beginning.
Once the system is loose, gently place the belt over the pulleys. It should sit naturally in the grooves without twisting or bending. The teeth of the belt must align properly with the pulley grooves for smooth movement.
After positioning the belt, check the alignment of the pulleys. If they are not in line, the belt will wear unevenly and may fail early. Using a straight edge or alignment tool can help ensure everything is properly aligned.
Next comes the critical step of setting the correct tension. If the belt is too tight, it puts extra stress on the system and leads to faster wear. If it is too loose, it may slip or create noise. Finding the right balance is essential for proper performance.
Finally, rotate the system manually a few times before starting the machine. This helps confirm that the belt is moving smoothly and that there are no unusual sounds or resistance. If something does not feel right, it is better to fix it immediately.
Common Installation Mistakes and Their Impact
| Mistake | What Happens | How to Avoid |
|---|---|---|
| Forcing the belt | Damaged teeth | Always loosen pulleys first |
| Poor alignment | Uneven wear | Use alignment tools |
| Incorrect tension | Belt failure | Adjust carefully |
| Dirty components | Reduced life | Clean before install |
| Skipping checks | Hidden issues remain | Inspect thoroughly |
Signs That Installation Was Done Right
After installation, the machine itself will tell you if everything is working as it should. A properly installed belt runs quietly and smoothly without vibration. The movement should feel consistent, and the belt should stay in place without shifting.
If you notice noise, shaking, or uneven movement, it usually means something is not right. These signs should not be ignored, as they often point to alignment or tension issues that need correction.
Maintenance Tips for Long-Term Performance
Installing the belt correctly is only the first step. Regular maintenance is what keeps it running well over time. Checking the belt at regular intervals helps catch small issues before they become serious problems.
Keeping the system clean is equally important. Dust and dirt can build up over time and affect performance. It is also helpful to check the belt tension occasionally, as it may change with use. Replacing worn parts early can prevent unexpected failures and keep the system running smoothly.
Quick Reference Guide for Installation
| Step | Action | Key Focus |
|---|---|---|
| Preparation | Clean and inspect | Avoid hidden issues |
| Positioning | Place belt gently | No twisting |
| Alignment | Check pulley line | Prevent uneven wear |
| Tensioning | Adjust carefully | Balanced tension |
| Final Check | Rotate system | Smooth movement |
What Most People Realize Too Late
Many people assume that if a belt fails, the product itself is the problem. In reality, the issue often lies in how it was installed or maintained. Poor alignment, incorrect tension, or skipped checks can lead to repeated failures, even with a good-quality belt.
Taking extra care during installation may take a little more time, but it saves much more time and cost in the long run. It is a simple step that has a lasting impact on performance.
Final Thoughts
Installing a toothed belt is not just about fitting it into place. It is about setting up the entire system for reliable and long-lasting performance. Each step, from preparation to final checks, plays an important role in how well the system will work.
When done correctly, the result is smooth operation, reduced noise, and a longer service life. Paying attention to the details during installation ensures that the system performs as expected without unnecessary interruptions.
FAQs
1. How tight should a toothed belt be?
A toothed belt should have balanced tension. It should not be too tight to cause stress on components, and not too loose to slip during operation.
2. Can I install a toothed belt without special tools?
It is possible, but using tools like alignment guides and tension gauges helps ensure better accuracy and longer belt life.
3. How often should I inspect the belt after installation?
It is best to check the belt shortly after installation and then at regular intervals to ensure everything remains in good condition.
4. What are the early signs of installation problems?
Noise, vibration, and uneven belt movement are common signs that something may not be installed correctly.
5. Do toothed belts require lubrication?
No, toothed belts do not need lubrication. In fact, oil or grease can damage the belt material and reduce its lifespan.