A moment of clumsiness can leave a mark that seems permanent. Maybe you are moving a heavy mixer across the counter and it tips over. Perhaps you are repairing a loose cabinet hinge and your drill bit skids across the wall. When the commotion ends, you see the evidence. One small section of your beautiful tile installation now has a visible crack running through it.
Your first thought is likely one of dread. You imagine the mess and expense of tearing out the entire backsplash and starting fresh. However, that extreme reaction is not justified. You can remove and replace just that one damaged unit with a little patience and the proper technique.
These small decorative pieces are generally attached to mesh backing for easy installation. Their compact dimensions actually make them simpler to repair individually than larger format tiles. The real challenge lies in working carefully enough to avoid damaging the pieces that surround the damaged one.
The following steps outline a reliable method for completing this repair.
Step 1: Source a Replacement Tile
Before you pick up any tools, you need to find a piece to fill the gap. Search your storage areas for any leftover materials from the original installation. Builders and DIYers almost always keep a few extra tiles tucked away for exactly this purpose. These are your best option because tile colors can change between production runs.
If you cannot locate your spares, do not lose hope. Take a small fragment of the broken tile to a reputable ceramic tile shop. The staff there are often skilled at identifying specific product lines and can help you find a close match that will blend acceptably.
A slight color variation on one tiny piece is a minor trade-off. A cracked tile is a permanent flaw that can also allow moisture to penetrate the wall. Most people will never notice a slight shade difference unless you point it out to them.
Step 2: Assemble Your Equipment
You do not need a garage full of expensive power tools for this job. Simple hand tools and a few basic supplies are all that is required. Gather the following items before you begin:
-
Protective eyewear
-
A grout saw or carbide-tipped scraper
-
A drill with a small masonry bit
-
A hammer
-
A putty knife or small chisel
-
A shop vacuum
-
Thinset mortar
-
Grout that matches the existing color
-
A small grout float
-
A sponge
Step 3: Remove the Grout Around the Tile
This is the most critical step in the entire repair process. The grout creates a rigid connection between each tile. If you do not remove it, the impact of breaking out the damaged piece will transfer through the grout and crack the adjacent tiles.
Put on your safety glasses and take your grout saw. Carefully scrape away the grout from all four sides of the damaged piece. You need to dig down to the bare wall or floor underneath to fully isolate the tile.
This part takes patience and physical effort. Do not rush through it. Once the grout is completely removed, the damaged piece is isolated from the rest of the wall, and you can work on it safely without putting other tiles at risk.
Step 4: Break the Damaged Tile
With the grout cleared, you can now remove the broken piece. Do not attempt to pry it out in one solid chunk. That method puts too much pressure on the backing material. Instead, you want to shatter the center and remove the pieces individually.
Use your drill and masonry bit to bore several holes in the center of the tile. This weakens the structure and makes it easier to break apart. If you do not have a drill, a nail set and a gentle tap with a hammer will achieve the same result.
Once the center is cracked, use your chisel or putty knife to break the tile into smaller fragments. Remove the pieces carefully, working from the center outward. Be especially gentle near the edges to avoid chipping the surrounding tiles.
Step 5: Clean the Empty Space
After the old tile has been removed, examine the cavity underneath. You will likely see old adhesive, bits of mesh backing, or dried mortar. These materials need to be cleared away to provide a flat, clean surface for the new tile.
Scrape the area with your chisel or putty knife. Remove any high spots without gouging the wall itself. Once the surface is reasonably smooth, use your shop vacuum to remove all dust and small debris.
Wipe the area with a damp rag and let it dry completely before moving forward. A clean, dry foundation is essential for the adhesive to bond correctly.
Step 6: Set the New Tile
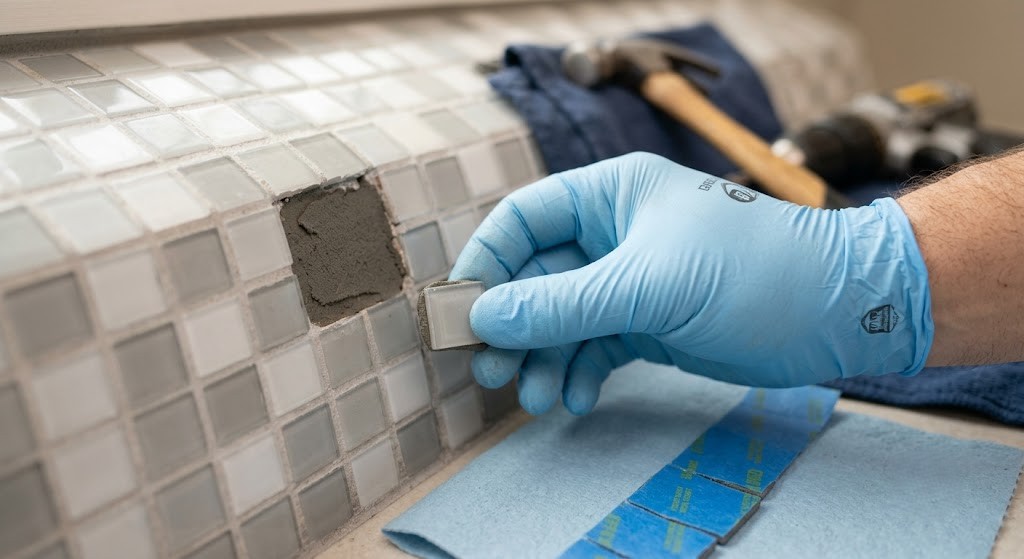
Take your replacement piece. If it is attached to a larger sheet of mosaic tiles, cut a single unit free using scissors or a utility knife. You only need one piece for this repair.
For the adhesive, you only need a small amount. Use a small tub of pre-mixed thinset or mix a tiny batch from dry powder. Apply the adhesive to the back of the tile, a technique known as back-buttering.
Press the tile firmly into the empty space. Ensure it sits flush with the surrounding tiles and that the gaps are even on all four sides. Use painter’s tape to hold it in place while the thinset cures. Allow at least 24 hours for drying.
Step 7: Apply the Grout
After the curing period, remove the tape. Gently press the new tile to confirm it is secure. If it does not move, you can proceed with the grouting.
Mix a small batch of grout. If you have leftover grout from the original installation, use that to guarantee the best color match. Press the grout into the joints using your float, packing the spaces completely. Scrape away any excess from the tile surface.
Wait approximately 15 to 20 minutes for the grout to set. Then, use a damp sponge to wipe the tile surface clean. Avoid pressing into the grout lines. Once the haze appears, buff it away with a dry cloth.
Wrapping Up
You have now completed the repair. The damaged area has been restored without requiring a full demolition project. The process demands patience, particularly during the grout removal stage, but the results are well worth the effort.
Keep your safety glasses on throughout the project. Work slowly and methodically. Once the grout is fully dried, the repaired area will blend seamlessly with the rest of the installation, and you can enjoy your beautiful surface as if the damage never occurred.