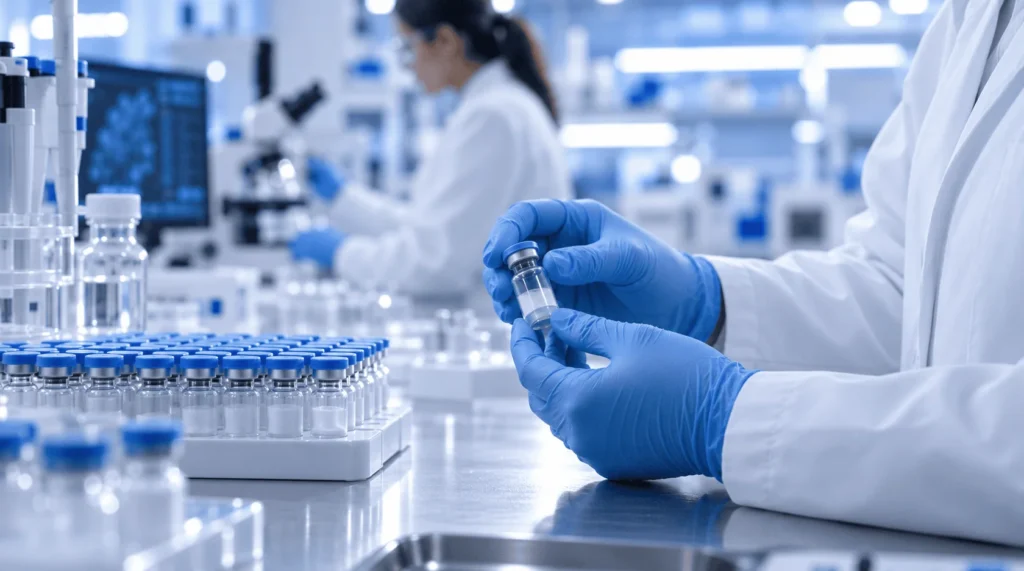
Properly dissolving freeze-dried compounds is the foundation of accurate biochemical assays, yet improper handling can destroy delicate molecular structures within seconds. Whether your laboratory sources supplies locally, such as premium research peptides in Houston, or orders from national biochemical distributors, mastering the reconstitution process is essential for reproducible data. This guide explains the exact laboratory protocols, solvent selections, and gentle mixing techniques required to transition lyophilized powders into stable, usable solutions.
Understanding Lyophilized Peptides and Why Reconstitution Matters
Lyophilization, commonly known as freeze-drying, removes water from a peptide sample under low temperature and vacuum pressure. Manufacturers ship peptides as lyophilized cakes or powders because amino acid chains degrade rapidly when exposed to moisture and ambient temperatures. Removing water locks the peptide into a stable solid state, extending its shelf life during transit and storage.
Before a researcher can run in vitro assays or analytical tests, the solid peptide must return to a liquid phase. This process, known as reconstitution, requires introducing a suitable liquid solvent to dissolve the powder without damaging its chemical bonds.
If a researcher introduces the wrong solvent or uses aggressive physical agitation, the peptide can undergo aggregation, oxidation, or hydrolysis. Damaged peptides yield skewed experimental results, wasted reagents, and irreproducible data. Treating reconstitution as a precise analytical step protects the integrity of your research from the start.
Essential Supplies Needed Before You Begin
Gathering all required materials before opening a vial minimizes the time the compound spends exposed to room temperature and airborne contaminants. Maintaining a clean, organized workspace reduces the risk of cross-contamination and mathematical errors during dilution.
A standard laboratory setup for peptide reconstitution includes the following items:
-
Sterile Syringes and Needles: Use sterile, single-use tuberculin or insulin syringes (typically 1 mL to 3 mL capacity) with fine-gauge needles (27G to 31G) to pierce vial stoppers cleanly without coring the rubber.
-
Alcohol Prep Pads: Standard 70% isopropyl alcohol wipes are necessary to sterilize the rubber stoppers of both the peptide vial and the solvent bottle.
-
Appropriate Solvents: Depending on the peptide’s amino acid sequence, you will need bacteriostatic water, sterile water for injection, or a dilute acidic/basic buffer.
-
Personal Protective Equipment (PPE): Nitrile gloves, lab coats, and eye protection prevent skin oils, enzymes, and microbes from contaminating the sterile workspace.
-
Calibrated Micropipettes: For small-volume aliquoting after the initial dissolution, calibrated pipettes ensure accurate concentration transfers.
Choosing the Right Solvent for Your Peptide
Selecting the correct diluent depends entirely on the net charge and hydrophobicity of the specific amino acid sequence. While water works for many sequences, forcing a hydrophobic peptide into pure water often results in cloudiness, clumping, or incomplete dissolution.
Bacteriostatic Water vs. Sterile Water
For the majority of hydrophilic (water-loving) premium research peptides, water is the standard primary solvent. However, researchers must choose between sterile water and bacteriostatic water based on their experimental timeline.
Sterile water contains no additives and is ideal for single-use experiments where the entire vial will be consumed immediately. Once the rubber stopper is punctured, sterile water has no defense against bacterial growth.
Bacteriostatic water consists of sterile water preserved with 0.9% benzyl alcohol. The benzyl alcohol inhibits bacterial proliferation, allowing researchers to draw multiple doses from the same vial over several weeks when stored properly. Always verify that benzyl alcohol will not interfere with your specific cell culture or enzymatic assay before using bacteriostatic water.
When to Use Acetic Acid or Specialized Buffers
Peptides containing a high proportion of basic amino acids—such as arginine, lysine, or histidine—carry a net positive charge and dissolve best in slightly acidic solutions. If a basic peptide fails to dissolve in water, adding a small volume of 0.1% to 1.0% dilute acetic acid usually clears the solution rapidly.
Conversely, acidic peptides rich in aspartic acid or glutamic acid carry a net negative charge. These sequences often resist dissolving in water or acid, requiring a slightly basic buffer like ammonium bicarbonate or phosphate-buffered saline (PBS) at a neutral to slightly alkaline pH.
For strongly hydrophobic peptides containing long stretches of alanine, valine, leucine, or phenylalanine, organic co-solvents are frequently necessary. Researchers typically dissolve these stubborn sequences in a minimal amount of dimethyl sulfoxide (DMSO) or acetonitrile first, then slowly dilute the mixture with water or buffer to reach the final working concentration.
Step-by-Step Protocol for Reconstituting Lyophilized Peptides
Following a consistent, methodical procedure prevents mechanical shearing of the amino acid chains and ensures accurate final concentrations.
Step 1: Equilibrate Vials to Room Temperature
Remove the lyophilized peptide vial from the freezer or refrigerator and allow it to sit undisturbed on the lab bench for 15 to 30 minutes. Opening a cold vial immediately exposes the hygroscopic powder to warm, humid room air. Condensation will rapidly form inside the glass, causing the powder to clump and altering the true weight of the sample.
Step 2: Sanitize Stoppers and Vent the Vial
Pop off the plastic flip-top caps from both the peptide vial and the solvent vial. Scrub both rubber stoppers thoroughly with fresh 70% isopropyl alcohol pads and allow them to air dry completely for at least 30 seconds. Wiping them dry with a paper towel reintroduces lint and bacteria, so patience is vital.
Some lyophilized vials are sealed under a vacuum, while others contain inert nitrogen gas at atmospheric pressure. If a vial is under strong vacuum, the plunger of your syringe will be pulled down forcefully when you insert the needle, causing the liquid to shoot directly onto the fragile peptide cake. You can equalize the pressure beforehand by inserting a sterile, detached needle briefly into the stopper before adding your solvent.
Step 3: Draw and Introduce the Solvent Slowly
Draw your calculated volume of solvent into a sterile syringe, ensuring no large air bubbles distort your measurement. Insert the needle through the center of the peptide vial’s rubber stopper at a 45-degree angle so the tip rests against the inner glass wall of the vial.
Depress the syringe plunger slowly, allowing the liquid to trickle gently down the side of the glass rather than blasting directly onto the lyophilized powder. High-velocity fluid streams generate shear forces that can physically break long peptide chains or cause immediate foaming.
Step 4: Dissolve Through Gentle Swirling
Once all the solvent is inside the vial, withdraw the syringe and dispose of it in a sharps container. Hold the vial between your thumb and forefinger and rotate it in a slow, gentle circular motion until the powder completely disappears.
Never shake a peptide vial vigorously. Shaking introduces air bubbles and creates mechanical stress at the air-liquid interface, which denatures tertiary structures and triggers irreversible protein aggregation. If small particles remain visible after two minutes of gentle swirling, place the vial in the refrigerator for 15 to 30 minutes and swirl again before considering a secondary co-solvent.
Calculating Concentration and Dilution Ratios
Accurate molarity or mass-per-volume calculations ensure that every experimental group receives the exact intended concentration. The basic formula for determining concentration is straightforward: divide the total mass of the peptide in the vial by the total volume of solvent added.
For example, suppose a vial contains 5 milligrams (5,000 micrograms) of lyophilized peptide, and you add 2 milliliters of bacteriostatic water. Dividing 5 mg by 2 mL yields a stock concentration of 2.5 mg/mL, which equals 2,500 mcg/mL.
If your assay requires a 250 mcg dose, you would draw 0.1 mL (10 units on a standard 100-unit U-100 insulin syringe) from that stock vial. Writing the exact reconstitution date, solvent type, and resulting concentration directly on the vial label prevents costly confusion during multi-week projects.
Solvent Compatibility Reference for Research Peptides
Selecting the appropriate diluent requires matching the chemical properties of the peptide sequence with the right liquid medium. The table below outlines standard solvent choices based on peptide characteristics and experimental needs.
| Peptide Characteristic | Recommended Primary Solvent | Secondary / Co-Solvent Option | Key Handling Consideration |
|---|---|---|---|
| Balanced / Hydrophilic (Neutral net charge) | Bacteriostatic Water (0.9% benzyl alcohol) or Sterile Water | Phosphate-Buffered Saline (PBS, pH 7.4) | Avoid benzyl alcohol if running sensitive live-cell assays. |
| Basic / Positively Charged (Rich in Arg, Lys, His) | Sterile Water or 0.1% Acetic Acid | 1.0% Acetic Acid | Add dilute acid first to dissolve, then dilute with water/buffer. |
| Acidic / Negatively Charged (Rich in Asp, Glu) | 0.1% Ammonium Bicarbonate or PBS (pH 7.4–8.0) | Dilute Ammonium Hydroxide | Avoid acidic solutions, which will cause immediate precipitation. |
| Hydrophobic / Non-Polar (Rich in Ala, Val, Leu, Ile, Phe) | Dimethyl Sulfoxide (DMSO) | Acetonitrile or Isopropanol | Dissolve in minimal organic solvent first, then add water slowly. |
| Oxidation-Sensitive (Contains Cys, Met, Trp) | Degassed Sterile Water | Buffer purged with nitrogen/argon | Minimize air exposure and store in small, single-use aliquots. |
Using this reference framework helps prevent cloudiness and precipitation before you introduce expensive reagents into your workflow. Always check the manufacturer’s Certificate of Analysis (CoA) for sequence-specific solubility notes prior to adding any liquid.
Common Mistakes That Ruin Reconstituted Peptides
Even experienced laboratory personnel can inadvertently degrade sensitive compounds through routine handling errors. Avoiding these common pitfalls preserves the structural integrity of your premium research peptides throughout the course of a study.
-
Injecting Liquid Directly Onto the Cake: Aiming the needle straight down into the center of the powder creates localized turbulence and foaming. Always angle the needle toward the glass wall so the liquid flows smoothly down the side.
-
Vigorous Shaking or Vortexing: When a powder refuses to dissolve immediately, the natural instinct is to vortex the tube. High-speed vortexing shears fragile peptide bonds and causes foaming, which traps molecules at the air-water interface and causes them to clump together.
-
Using Expired or Unbuffered Solvents: Tap water, unbuffered saline with altered pH, or expired bacteriostatic water introduce trace metals and microbes that rapidly cleave amino acid bonds. Only use fresh, laboratory-grade sterile diluents.
-
Repeated Freeze-Thaw Cycles: Freezing and thawing a liquid peptide solution repeatedly forms ice crystals that physically disrupt molecular structures. If you do not plan to use the entire reconstituted vial within a few weeks, divide the solution into single-use microcentrifuge tubes before freezing.
Proper Storage After Reconstitution
Once dissolved in liquid, peptides lose the long-term stability they possessed in their lyophilized state. Temperature control and protection from light become critical immediately after reconstitution.
For short-term use spanning one to four weeks, store the reconstituted vial upright in a laboratory refrigerator maintained at 2°C to 8°C (36°F to 46°F). Keep vials away from the refrigerator door, where temperature fluctuations occur every time the unit opens, and store them inside a dark box to prevent UV light degradation.
If an experiment requires storing reconstituted peptides for several months, aliquot the liquid into sterile, low-binding polypropylene tubes and freeze them at -20°C or -80°C. Low-binding tubes prevent the peptide molecules from sticking to the plastic walls, ensuring your concentration remains accurate when you thaw an aliquot for future testing.
Reconstituting lyophilized peptides is a straightforward process when approached with patience, sterile technique, and an understanding of basic amino acid chemistry. Allowing vials to reach room temperature, selecting a solvent that matches the peptide’s net charge, and swirling gently rather than shaking will preserve the molecular integrity of your samples. By dividing larger volumes into single-use aliquots and maintaining strict cold-chain storage, researchers can eliminate unnecessary variables and generate consistent, reliable laboratory data. Take the time to verify sequence solubility on your Certificate of Analysis before puncturing your next vial to ensure smooth dissolution every time.
Frequently Asked Questions
Why does my reconstituted peptide solution look cloudy instead of clear?
Cloudiness indicates incomplete dissolution or precipitation, usually caused by a mismatch between the peptide’s net charge and the solvent’s pH. If you used pure water for a hydrophobic or strongly charged peptide, the molecules may clump together rather than disperse. Gently warming the vial to room temperature or adding a small amount of an appropriate co-solvent, such as dilute acetic acid for basic peptides or DMSO for hydrophobic sequences, often clears the solution.
Can I use normal saline (0.9% sodium chloride) to reconstitute all peptides?
No, normal saline is not universally compatible with all lyophilized peptides. While it works well for certain robust sequences, the high salt concentration can cause some peptides—especially those with specific hydrophobic or charged regions—to salt out and precipitate from the solution. Unless a protocol specifically calls for saline, bacteriostatic water or sterile water is generally a safer starting point.
How long do reconstituted peptides remain stable in the refrigerator?
When reconstituted with bacteriostatic water and stored at 2°C to 8°C, most stable peptides remain viable for approximately 2 to 4 weeks. However, sequences containing cysteine, methionine, or tryptophan are prone to oxidation and may degrade faster. If you used plain sterile water without preservatives, the solution should be used within 24 to 48 hours to prevent bacterial contamination.
What happens if I accidentally shake the peptide vial during mixing?
Shaking creates foam and introduces mechanical shear stress, which can unfold or break delicate amino acid chains. If you accidentally shake a vial, stop immediately and place it upright in the refrigerator for several hours to let the foam settle and allow intact molecules to stabilize. While shorter, sturdy peptides may survive minor agitation, larger or more complex structures may lose biological activity.
Should I store lyophilized peptides in the freezer before reconstituting them?
Yes, un-reconstituted lyophilized peptides should be stored in a freezer at -20°C (or -80°C for long-term storage exceeding a year) in a moisture-free environment. Keeping the freeze-dried powder cold and dry prevents slow degradation, oxidation, and moisture absorption, ensuring the compound remains fully potent until you are ready to dissolve it.